

With the help of MANY friends....
Carrying the Walls up the hill (it looks small, but when you are carrying something it's EVEREST!)
Aligning the Walls
The LAST WALL going up!
Admiring the work...
A look at the interior walls
A look at the exterior walls
Tuesday, June 10, 2008
And The Walls Go Up
Floor - Day Two
The Weather for Day 2 was NOT as nice as Day 1, but we made it through...ok...Mark and Andy made it through, Sarah and Kim sat in the Shed trying to stay warm!
So you can see we had a very different day...


Sarah's Dad and the 2 Dogs getting ready to work.

Sarah was the firebug today...

Every Sheet needed to be carried up the hill...I (Kim) was SO HAPPY when Ben showed up and took over my job of carrier. My Minnesota lungs and arms were not strong enough for that!

And then the rain came!

And came....

But Mark and Andy kept going and finished!

Oh...and the hole Mark is standing by, well that's for the spiral staircase. We all had the pleasure of watching him fall down it about 10 mins after this picture was taken. Good thing he didn't get hurt.
Now for the Floor - Day One...GORGEOUS!
Memorial Weekend - Time for reflection, relaxation, and in Bruemmer's case...more building...this time with volunteers!


And the Building Begins
As Mark and Sarah begin to venture into the crazy world of "Home Ownership", I thought I'd share some photos of their journey...Enjoy!!

Digging the Hole

Digging the Hole

Foundation Work

Arrival of the Crane

Ready to Backfill
Monday, June 02, 2008
New Author
Hi Every!
Mark has granted me access to his blog so I can help him keep everyone up-to-date on his house! I will try to update this page with new pictures every time he sends me new pictures. Stay tuned for more info....
Kim
Monday, October 10, 2005
Old Fall River Road (Rock Mt. Nat. Park) 10/2/05
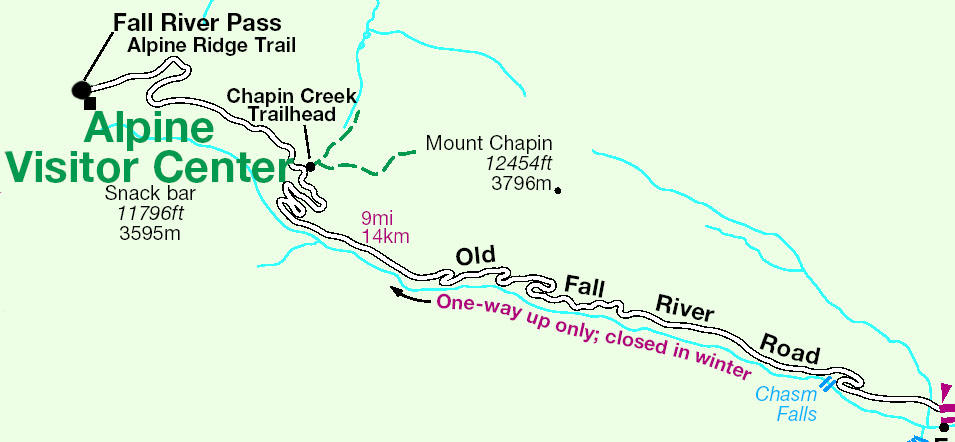
Well I decided to bike up Old Fall River Road in Rocky Mountain National Park. The Road is one-way, dirt, and has a 16% average grade. The starting elevation is around 8,400ft and the ending elevation is 11,796ft. I could have rode the whole 20 mile loop, but instead I found a ride with a local back to my car. Bike setup:
Surly 1x1 (single-speed)
Large marge wheelset
Bob trailer (for pure fun)
And a water bottle from Wausau WI (Received at Gnomefest II)
This bike was built for Minnesota snow and now it lives in Colorado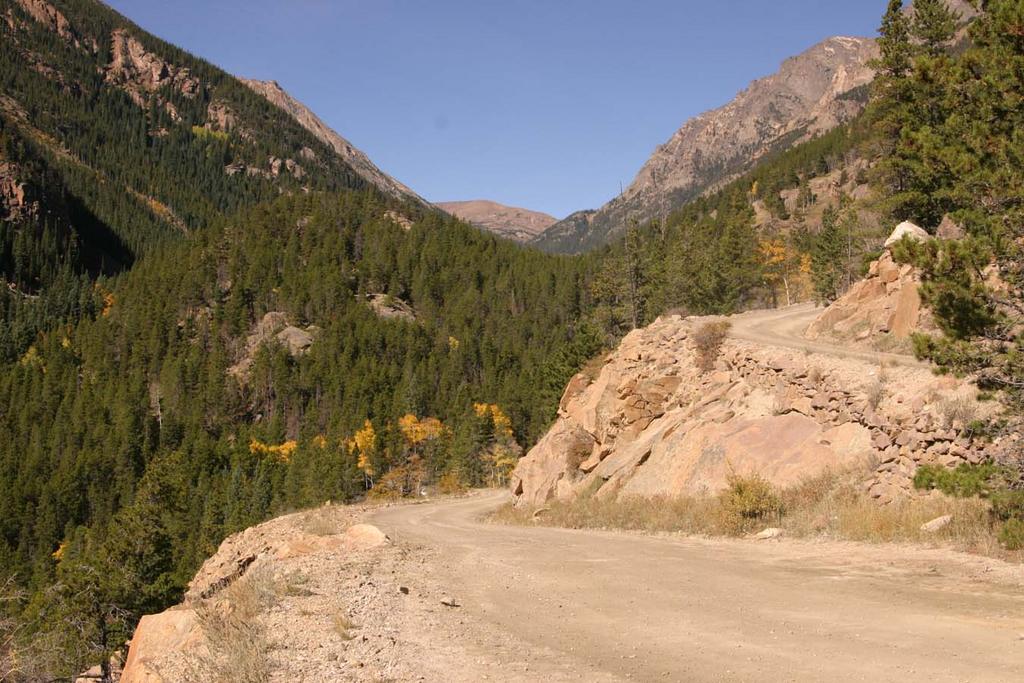
Pictures of the switchbacks
I have driven a car up this road many times and decided the views are better from the bike. 
This is taken from about mile 7
In this picture you can start to see the Alpine Visitor Center This was taken from the top of the Old Fall River Road! I was planning on taking this route again this weekend but the snow decided to close the road :(
I can't wait to ride it again (next time without the extra gear)
Twin Sisters Peaks 11,428ft 9/25/05

I woke up Sunday morning and decided to hike the Twin Sisters Peaks in Rocky Mountain National Park in Colorado. The trip took me about 3hrs and the weather was great.
The hike includes views like this of Longs Peak (see previous entry on Longs)
I noticed more snow on Longs this weekend than the weekend that I was able to summit it.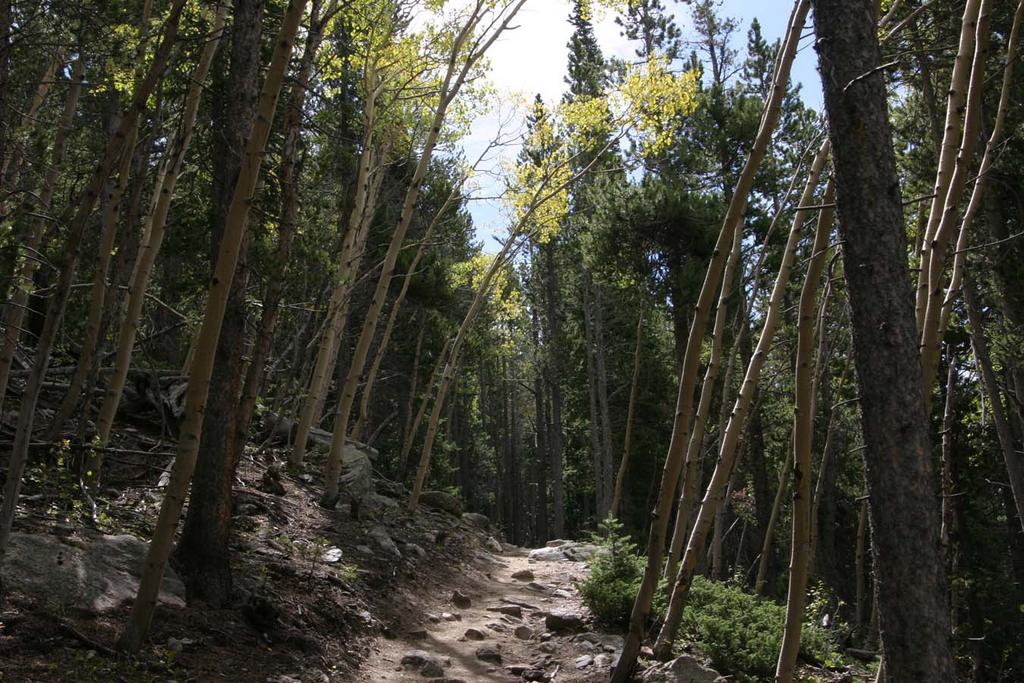 The hike was in the trees until about 10,500ft elevation. This photo shows some of the aspen trees in this area.
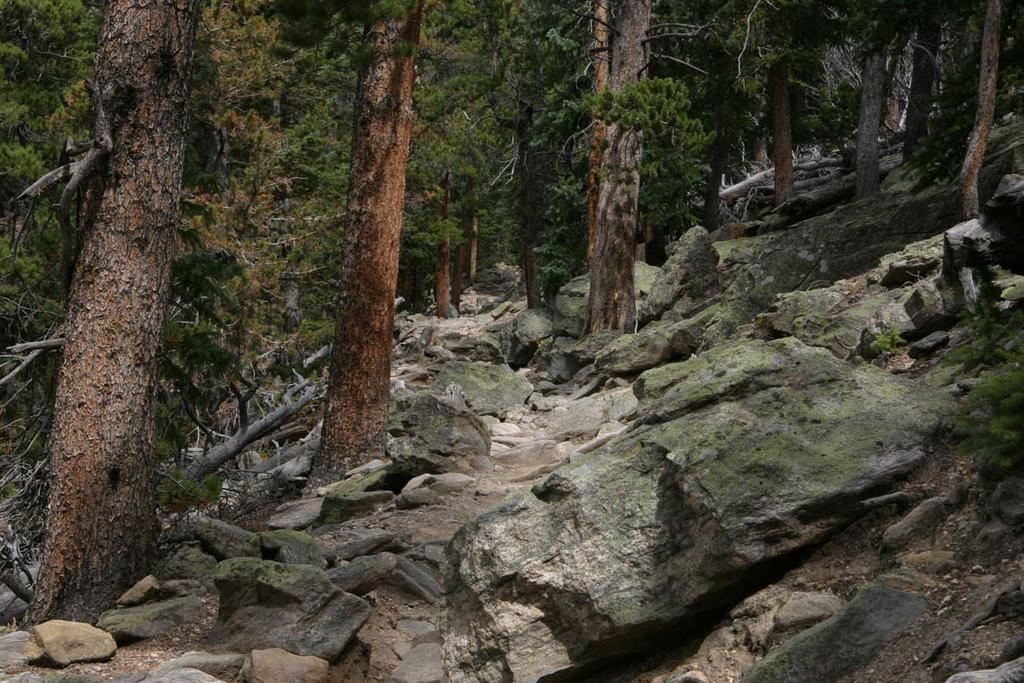 The trail became very rugged and technical.
 If you look close, you can see Lake Estes in Estes Park and see some of the city.
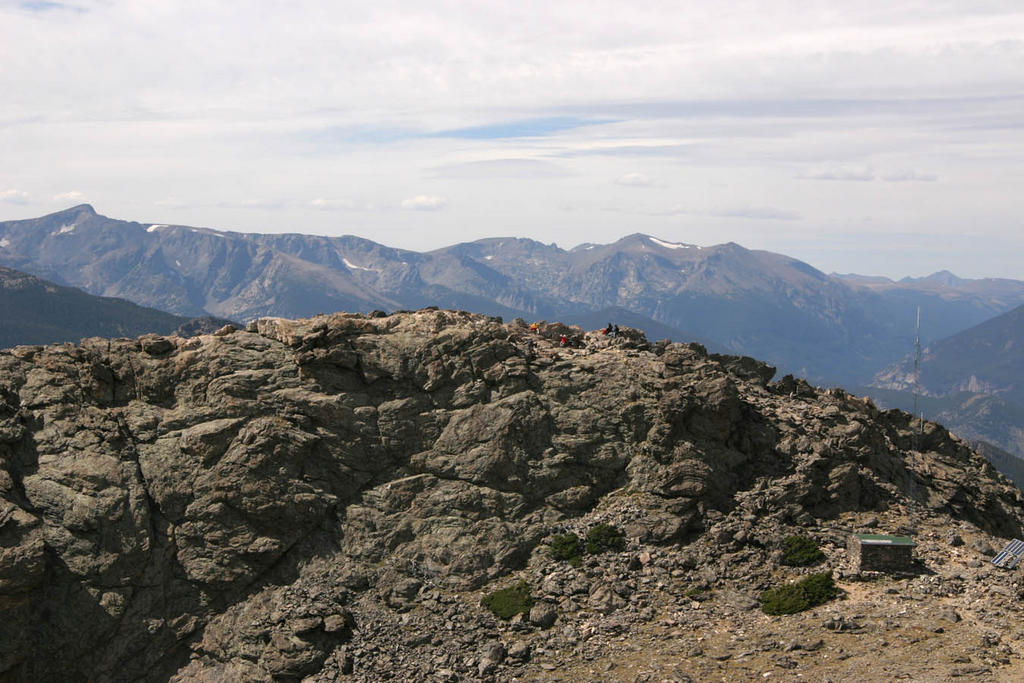 This picture was taken from the less traveled East Sisters Peak. It was very windy on top of this sister.
 This is facing South between the two sisters
Tuesday, September 13, 2005
Longs Peak (14,255 ft) 9/11/05
Longs Peak: 5100 ft elevation gain, class 3 difficulty, 15 miles round-trip
| Class 3 | Scrambling or un-roped climbing. You must use your hands most of the time to hold the terrain or find your route. This may be caused by a combination of steepness and extreme terrain (large rocks or steep snow). Some Class 3 routes are better done with rope. |
I decided to solo climb Longs Peak for the reason that the trail is heavily used and I would see people throughout the climb. This trip was physically and mentally exhausting. It is important to start the journey before 6 am to summit well before the afternoon thunderstorms. I started late at 8:30 am and made it this the summit by 2:20 pm. When I reached the top the clouds started to form. I only stayed at the summit for 5 minutes. The round-trip took me only 9hrs and 45mins. Most guide books recommend 12-15 hours so I made good time.

From the Ranger Station, start up the great East Longs Peak trail. Hike 0.5 miles to a signed trail junction - stay left on the main trail. Continue up through the forest and pass Goblins Forest. The trail comes close to Alpine Brook a couple of times. Switchback up a hill before crossing Alpine Brook on some log bridges.
Above taken from :
http://www.14ers.com/
A great website for more information about Longs Peak and other Colorado 14ers.
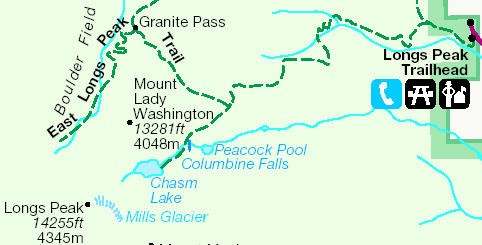
Leave the heavy forest shortly after the stream crossing and continue up to tree line near 11,000' (approximately 2.5 miles from the trailhead). Longs is now in view as well as the route past Mt. Lady Washington and over to Granite Pass
Above also taken from: http://www.14ers.com/
Above also taken from: http://www.14ers.com/
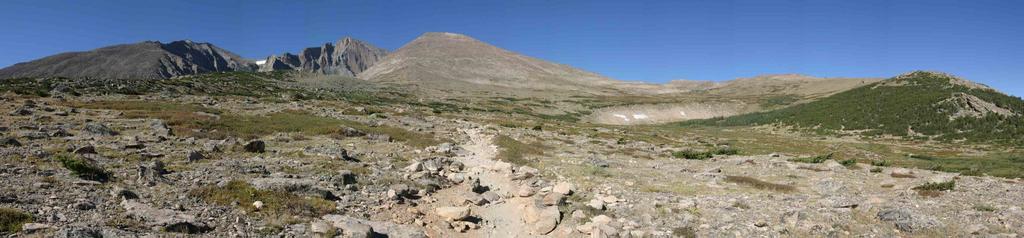
Mt. Lady Washington is the ridge to the right in this picture. The trail travels around Mt. Lady Washington to Granite Pass.

After granite Pass the trail heads towards the Boulder field and the Keyhole. (both not pictured due to weather on the way down)
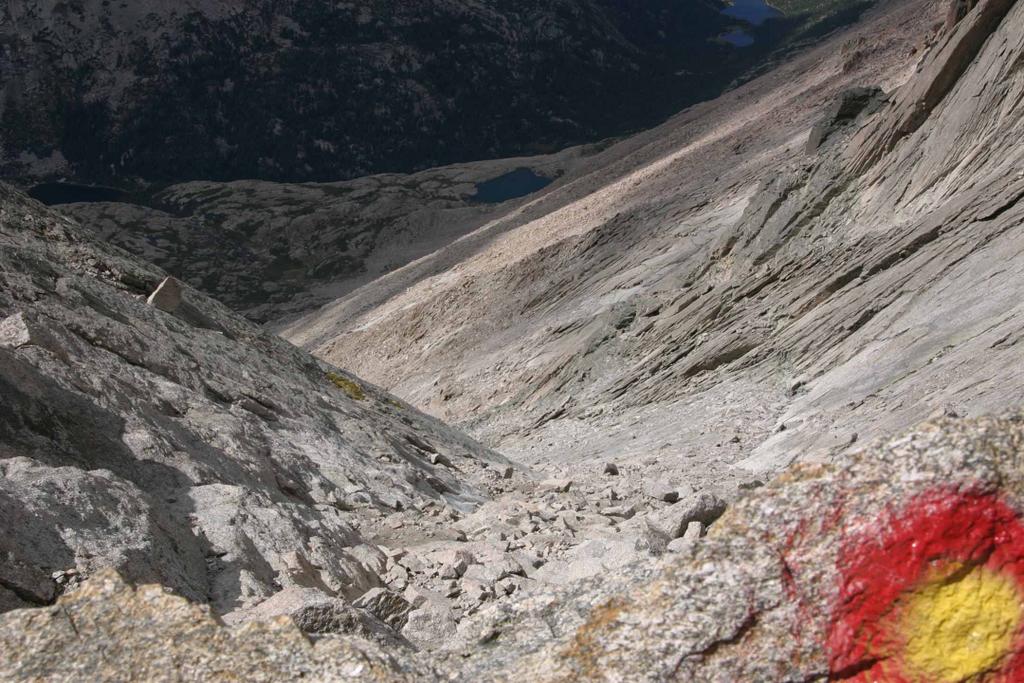
After the passing through the Keyhole, I traveled along the Ledges towards the Trough. It is a little better than a mile to the summit from here but the hardest mile of the climb. The trail was marked with bulls-eyes painted on the rock to show where the trail lead.
This picture shows a top view of the Trough. The trail section of the Trough starts at 13,300 ft and last for 600ft elevation gain. This was the hardest part of the climb. The rock is mostly stable but there are a few sections of small, loose rock. (notice the bulls-eyes on the rock.)
In a previous blog entry I hiked to Mills Lake. This picture also shows Mill Lake in the upper right corner.
 The section after the Trough is called the Narrows. The becomes very narrow with a significant fall (1000+ft) only inches from the trail. Areas of the narrows are only 10 inches wide with a large fall to the bottom of the valley. A number of people die after the keyhole due to weather. If this trail would have been wet the rock would have been very slippery. (notice more bulls-eyes)
 Finally the Homestretch!!! Only 300ft vertical left to the summit. By this point, I was only able to climb 5-10 yards before I needed to take a rest. The elevation was 14,000 and I could feel my heartbeat in my neck. I took my time because I did not want to get sick at this point of the climb.
 This is a view of Chasm Lake and Peacock pond from the summit
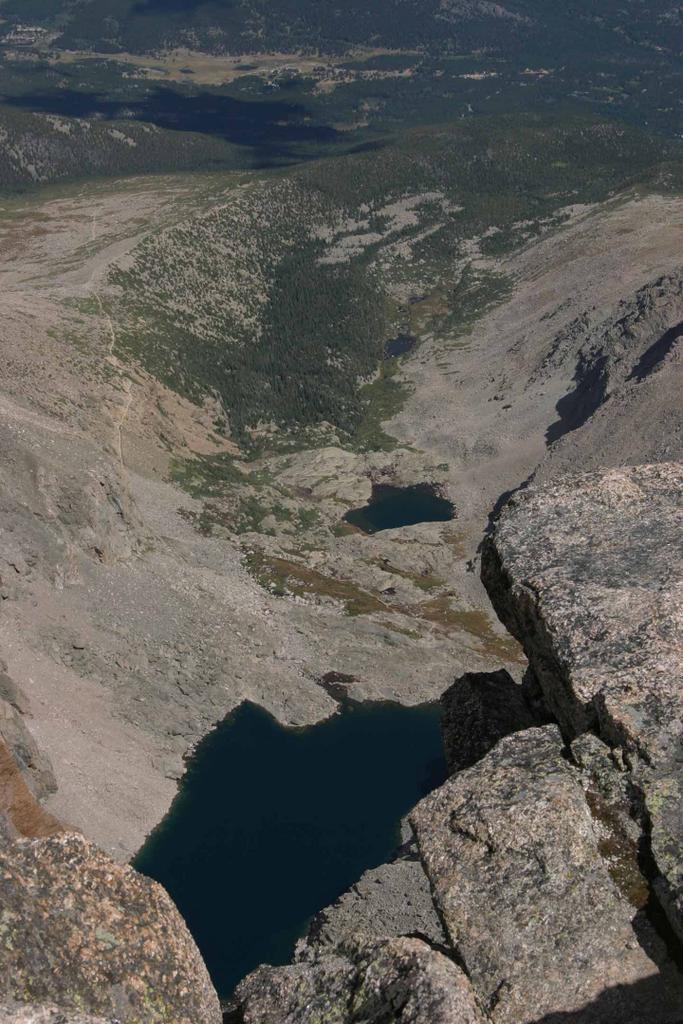
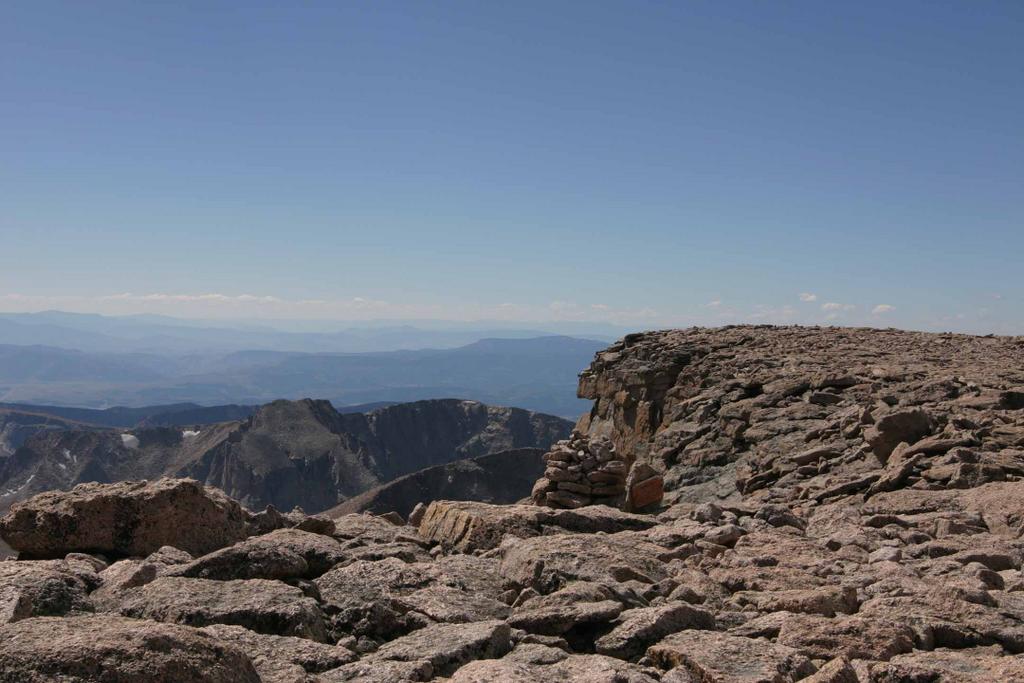
Facing southwest from the summit

The Summit!! 14,255ft
On the way down I was planning on taking more pictures but I got snowed on for 2 hours after the Keyhole and then an electric storm hit right after I made it to the treeline.

This picture shows the snowstorm
I would like to climb Longs Peak again since it is so close to our house (45mins to trailhead). I would definitely want to go with someone and spend more time on the summit and parts of the trail taking more pictures. I am disappointed that I did not get all of the picture that I wanted to show the view of the climb.
Mark
Subscribe to:
Posts (Atom)
